Chapter 1: Introduction
Isometric Pixel Art
While you may or may not care about the mathematical uses of isometric projections, for the purposes of this guide the term “isometric” will apply to the style of art.
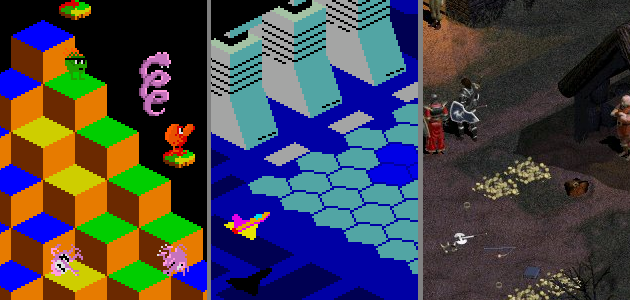
1.2: Some isometric games: Q-Bert, Zaxxon, Diablo.
This introduction contains both a technical definition of isometric art, but more importantly, how that concept fits into some simple rules that can result in some visually stunning works.
Isometry

1.1: Axonometric projection. Totally clear now, right?
In mathematics, an isometry is a distance-preserving isomorphism between metric spaces. An isometric projection is one method of visually representing a three dimensional object in two dimensions, and is generally used for visualizing engineering drawings in pseudo-3D.
Got all that? That’s a very technical definition, and for the purposes of pixel art, we don’t care about any of that other than to say it looks really cool when done correctly.
Isometric pixel art is a style of digital art that originated from limited video game display capabilities, but truly found its voice with the underground art scene, as many art forms tend to. This art style is strongly typefied by old games like Q-Bert or Zaxxon, some of the first mass-market games to use this perspective. While most isometric pixel art is cartoonish in nature, some artists can achieve impressive near-photorealistic effects in their art.
Tools Required (Software)
If you’re reading this from a Windows system, or really any modern operating system, you most likely have all the tools you need already installed. Contrary to what you might think, amazing pixel masterpieces can (and frequently are) created using software as simple as Microsoft Paint. Paint contains all of the basic tools necessary for creating pixel art, but if you are experienced in Photoshop, you will definitely have an advantage in the ability sling raw pixels around.
If you are just starting out, using basic software may work for you. If you’re willing to take the time to learn (and have access to it), Photoshop can give you amazing power over your images, with the ability to quickly reuse assets when necessary. I originally wrote these tutorials with Photoshop in mind, but many of the concepts should translate easily to other graphics software.
Nowadays, there are programs designed with pixel art specifically in mind, a luxury which didn’t exist a decade ago. Aseprite is available for $14.99, but in my opinion 100% worth the price if you’re serious at all about pixel art. Grafx2 is an open source 256-color drawing program inspired by Deluxe Paint for the Amiga.
No what software you use, most basic pixel art techniques will be accessible. I’ll start with some basic techniques, and the more advanced chapters will use more features of Photoshop. Proper use of layers and transparency can produce effects that are extremely difficult and tedious to create using software that doesn’t support layers. It’s certainly not impossible, but if you’re at that stage you have no need for this guide.
Let’s create some pixel art!
Ideas/Research
Chances are you’ve got an idea of what you want to do already, but try and keep some constraints in mind. Because of the nature of isometric art, most pieces will be from a partially-overhead view, and there will be no perspective distortion or natural horizon. What this means is that while everything has the illusion of perspective, depth cues are produced by the surrounding.
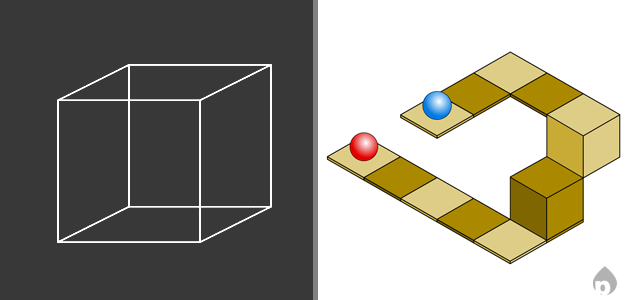
Without depth cues, we end up with ambiguous figures.
Once you’ve got your idea, it’s sometimes still good to research it before sketching it out. This can be a good way to get examples of hidden details in a scene, building elements, or be introduced to new concepts. For example, if you are creating a building with deco elements, you might want to look for references like the Chrysler building, and other significant deco structures. Some buildings have a fire escape system, and others have distinctive patterns.